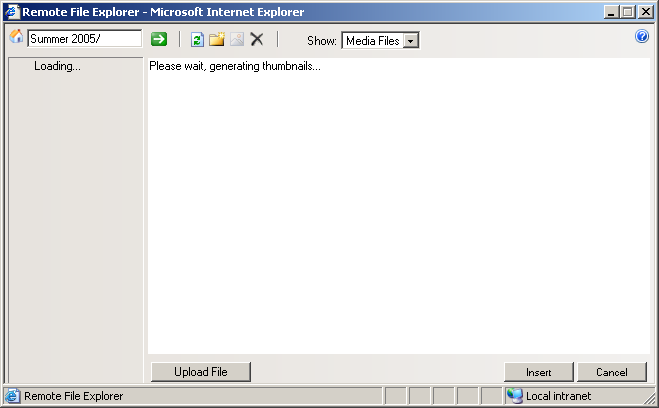
The Remote File Explorer window is displayed
when you click the Image, Link
to Document or Content Template buttons
from the toolbar, or similar buttons in certain Properties panels:
To learn how to work with this window, follow the instructions below:
A tree-menu explorer (folder
navigator) is displayed on the left, showing the folder structure on the
server. The files included in the selected folder are displayed as thumbnails
on the right. You can select one or more files (holding the Ctrl
or Shift key pressed). You can
copy, cut and paste files between folders. Files can also be renamed and
duplicated. For a complete description, check out the right-click contextual
menus when manipulating folders
and selecting files!
The next time you launch the Remote File Explorer,
the folder that you worked with previously will be remembered and its
content will be displayed.
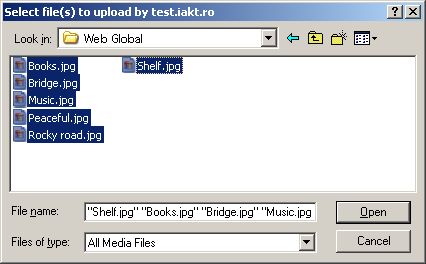
By clicking the Upload File button, a window will pop-up offering
the possibility to look in the (local) folder structure. Browse to the
needed folder, select one or more files (hold the Ctrl
or Shift key for multiple selection),
and then click the Open button:
All the selected files will be uploaded to the remote server, and you
can see them displayed as thumbnails in the Remote
File Explorer window.
Note 1: The types of files that are by default allowed for upload
are:
~ document types: .doc, .pdf,
.csv, .xls, .rtf, .sxw, .odt
~ media file types: .bmp, .mov,
.mpg, .avi, .mp3, .mpeg, .swf,
.wmv, .jpg, .jpeg, .gif, .png
This file list can be modified according to your needs. Click to learn
how to do it manually, in
Dreamweaver, in Visual Studio.
Note 2: Remember that when uploading images, in case they exceed
the maximum dimensions set in the configuration file, they will be boxed-resized.
Read more here.
By clicking the Insert
button, all the files selected (hold the Ctrl
or Shift key for multiple selection)
in the current remote folder will be inserted in page.
Note: Document files will be inserted as links. Once a link
is pressed, the document file stored on the remote server will be opened.
By clicking the Cancel
button, the Remote File Explorer window will
close and no file will be inserted in page (even though they are selected).
This operation will not cancel the creation of new folders on the remote
server or the upload of new files.
No matter what folder is currently selected in
the tree-menu on the left, when you click the Home
button, the home folder on the remote server will be accessed and its
files will be displayed on the right. If you haven't done any specific
settings in this regard, the home folder is by default the root folder.
The Home text box on
top of the interface displays the path to the current folder (that has
its files displayed as thumbnails in the files area on the right). The
displayed path is relative to the folder root defined in the File
Browser module.
In the Home text box you can also type the
path to a certain folder (e.g. folder_1/folder_12/). If the folder is
straight on the root, you can simply type its name. Once you click the
Go button, the files in that folder will be
listed on the right.
By clicking the Go button,
the file browser will navigate to the folder specified (its path) in the
Home text box. If the text box is empty, the
files stored on the main root will be displayed in the files area on the
right.
By clicking the Refresh
button, the content of the current folder will be refreshed: the included
files will be reloaded. This way, if any change occurred meanwhile in
the folder structure, it will become visible after refreshing:
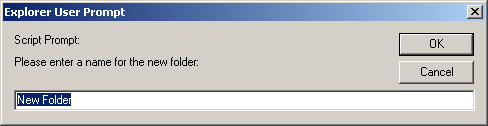
With the New Folder
button you can create new folders in the remote folder structure. Once
you click the New Folder button, you will be
prompted to enter a name for the new directory:
Note: The default name is New
Folder. If you leave it like that, and then try to create another
folder in the same parent one, the new suggestion will be New
Folder 2, and so on (New Folder
3, New Folder 4, etc.).
If there is no folder selected when you click
this button, the new directory will be created straight on the root.
If there is a folder selected, it will become
the parent of the new directory.
The Edit Image button
is only enabled when an image file is selected in the files area. Once
clicked, it will open the KTML
Image Editor window, that provides a complete set of operations
to help bring images in perfect shape.
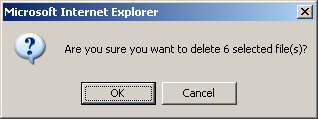
By clicking the Delete
button, you will be prompted to confirm the deletion of the currently
selected file(s) or folder from the remote server:
If the selected folder is empty, it will be deleted without asking
for confirmation.
Note: The same operation can be performed by using the Delete key from the keyboard.
According to the upload
folders you set for document, media, and template files, the Show drop-down menu will display certain options.
Depending on the selected option, only files of the specified type from
the remote folder will be displayed (as thumbnails), simplifying your
work.
The option selected in the Show drop-down
menu also influences the files upload operation: when clicking the Upload File button, only the type of file specified
in the Show drop-down menu will be displayed
(in the folder from which you are uploading files).
All the possible options displayed in the Show
drop-down menu (in different situations) are:
· All
Files
· Media
Files - it is the default option when you click the Image
button. It includes images and video files.
· Images
· Documents
- it is the default option when you click the Link
to Document button.
· Templates
- it is the default option when you click the Content
Template button. It is always displayed as disabled, no matter
if the configured templates upload folder coincides or not with the documents
and/or media files upload folder.
Note 1:
If the documents upload folder and the media files upload folder differ,
when you launch the Remote File Explorer window
by clicking the:
· Image
button from the toolbar, the Show drop-down
menu will contain the following options: Media Files,
Images.
· Link
to Document button from the toolbar, the Show
drop-down menu will contain the following option: Documents
(disabled).
Note
1.1: In this situation, when the two upload folders differ (for
media files and documents), there are two possible way in which you can
create links to images:
You can upload the image in the documents
upload folder and then create a link
to it as if it were a document file.
You can upload the image in the media
files upload folder and then create a thumbnail.
Note 2:
If the documents upload folder and the media files upload folder are the
same, when you launch the Remote File Explorer
window by clicking either the Image or Link to Document button from the toolbar, the Show drop-down menu will contain the following options:
All Files, Media Files,
Images, Documents.
The Help button on the
top-right corner of the interface has the same role as described here,
just that it regards the Remote File Explorer
interface.
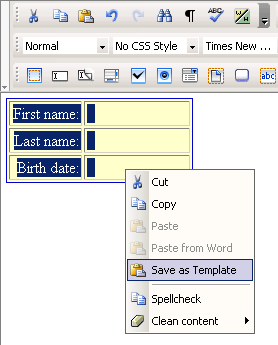
The Remote File Explorer
interface changes a little when it is called by clicking the Save
as Template option in the right-click contextual menu:
The difference stays in the fact that the Browse
and Select buttons are replaced (respectively)
by the Save Template As text box and the Save button:
In the Save Template As
text box enter the name (without extension) of the new template file.
The automatically added extension when saved is .ktpl.
Click the Save button
after you named the template file and after you selected a folder in the
tree-menu explorer. The template will be saved in the selected folder.
Notice that the Show
drop-down menu is disabled and set on Templates.
This is why only the template files in the current folder are displayed
as thumbnails.
Note 1: The folder structure
displayed in the tree-menu on the left can differ when you call the Remote File Explorer window using the Image
button from when you call it using the Content Template
button. This is set in the configuration
options.
Note 2: The Ctrl+A,
Ctrl+X, Ctrl+C,
and Ctrl+Vshortcut
keys work in the Remote File Explorer as
well, allowing you to select all, cut, copy, and paste files.
Copyright
1991- 2025
Web Global Net All Right Reserved. 800-768-6024 • Terms of Use